Verification
In a recorded web UI test, verification is the most important part. RITE provides two ways of verification.
Right click to verify element’s attributes
For most of the time, you might just want to verify whether the attributes of an element are as expected. During recording, you could right click on any element which needs verification, and a popup will be shown in the main console:
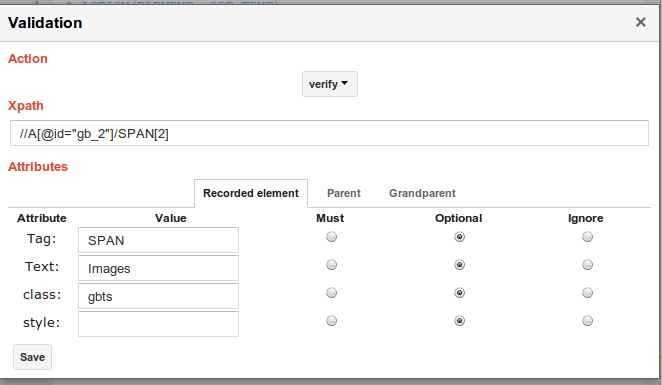
This dialog is used to generate the not so obvious commands, in this case, the verify command (you could also generate verifyNot and mouseover command here). As is shown, the dialog contains the xpath and all the attributes of the selected dom element. For example, if users want to verify that the dom element needs to have the text “Images”, then they could simply switch from Optional to Must. As a result, during playback, if the dom element doesn’t have the exact text, it would report an error.
A real example
Let’s open our example site again. In record mode, let’s right click the bold font text “verify this”, this will open the Validation dialog in console. If we’d like to verify both the text and and style, we’ll need to choose the corresponding “Must” radio buttons. After that, we click save button to generate the verify command. We could always change it again in the details dialog.
Custom script to verify more complicated tasks
The other way is to call custom JS functions. More details will be discussed in the custom script section. In short, for verification like validate the number of entries in page, whether a group of elements are aligned up, or whether the page title is correct and background color looks alright, users could write their own JS script to verify.
Comments
You do not have permission to add comments.