Playback
The prerequisites to playback
First of all, you would need either load an existing script or record something. In other words, you’d need to make sure there is some code in the RPF editor. During playback, RPF will execute the script line by line.
How to start playback
Click the playback button in the RPF menu bar. This will bring up a playback runtime dialog on top of the main console. If we simply click the play button, RPF will automatically:
- Opens a new tab and gets content script injected.
- Parses the script and forms a list of commands. (for example: click..., type.. etc.)
- Sends a request to content script listener to execute command by command in the tab.
- Receives the result and either retries it or continues with the next command.
- Returns either a pass or failure when done.
The playback runtime dialog
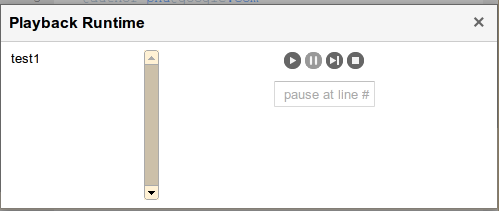
On the left side, it lists all of the script names of the current project. You could select one or more script to playback. Otherwise, if you don’t select any, it will playback the currently loaded script by default. Also, if you didn’t load any project yet, it won’t show the left side selector at all. While you playback a group of scripts, it will show you the current status like x out of y are completed, and you’ll have a choice to cancel the whole run by clicking the X cancel button.
The right side panel is the main controller for playback a script. It’s obvious to understand the buttons which are: play, pause, step by step, and stop. It’s worth mentioning that you could also set a break point step in the input box. This is useful if you expect something will go wrong immediately after the step. If you encounter any issues during playback, you could always try the stop button to clear any status and continue to playback.
The failures
Normally there are two types of common failures during playback.
URL redirection timeout
This happens when an expected URL redirection takes too long (by default, greater than 40 secs). It could be caused by several reasons: 1. The element you’ve interacted with doesn’t go to the original URL any more. 2. The new URL takes too long until it finishes loading.
Dom element couldn’t be located
Since the fragility of web UI testing, once the dom elements are changed, it’s possible that we couldn’t locate the element anymore. Normally RITE retries to find the element for 6 secs by default until it reports the error.
How RITE handles the failures
This time, let’s play with the bold “verify this” text in our example site by:
- Enter record mode.
- Right click on the “verify this” text.
- In the newly popped up dialog on RITE main console, let’s change the “verify this” to “verify” and change its corresponding option from “Optional” to “Must”, and finally hit Save to generate the command.
- Playback the script until it fails. Note that this failure was introduced when we made the change in step 3 to simulate a scenario that dom text changes.
At this point, we should see the following options appeared in the playback runtime dialog.

We could definitely choose “delete” to remove the line, but let’s try “Update” now. Once clicked, the tab under playback should pop up to front and if you right click on the “verify this” text again, the original dom element will be replaced by the new element. In the end, you could playback the script again and it should pass now.
Comments
You do not have permission to add comments